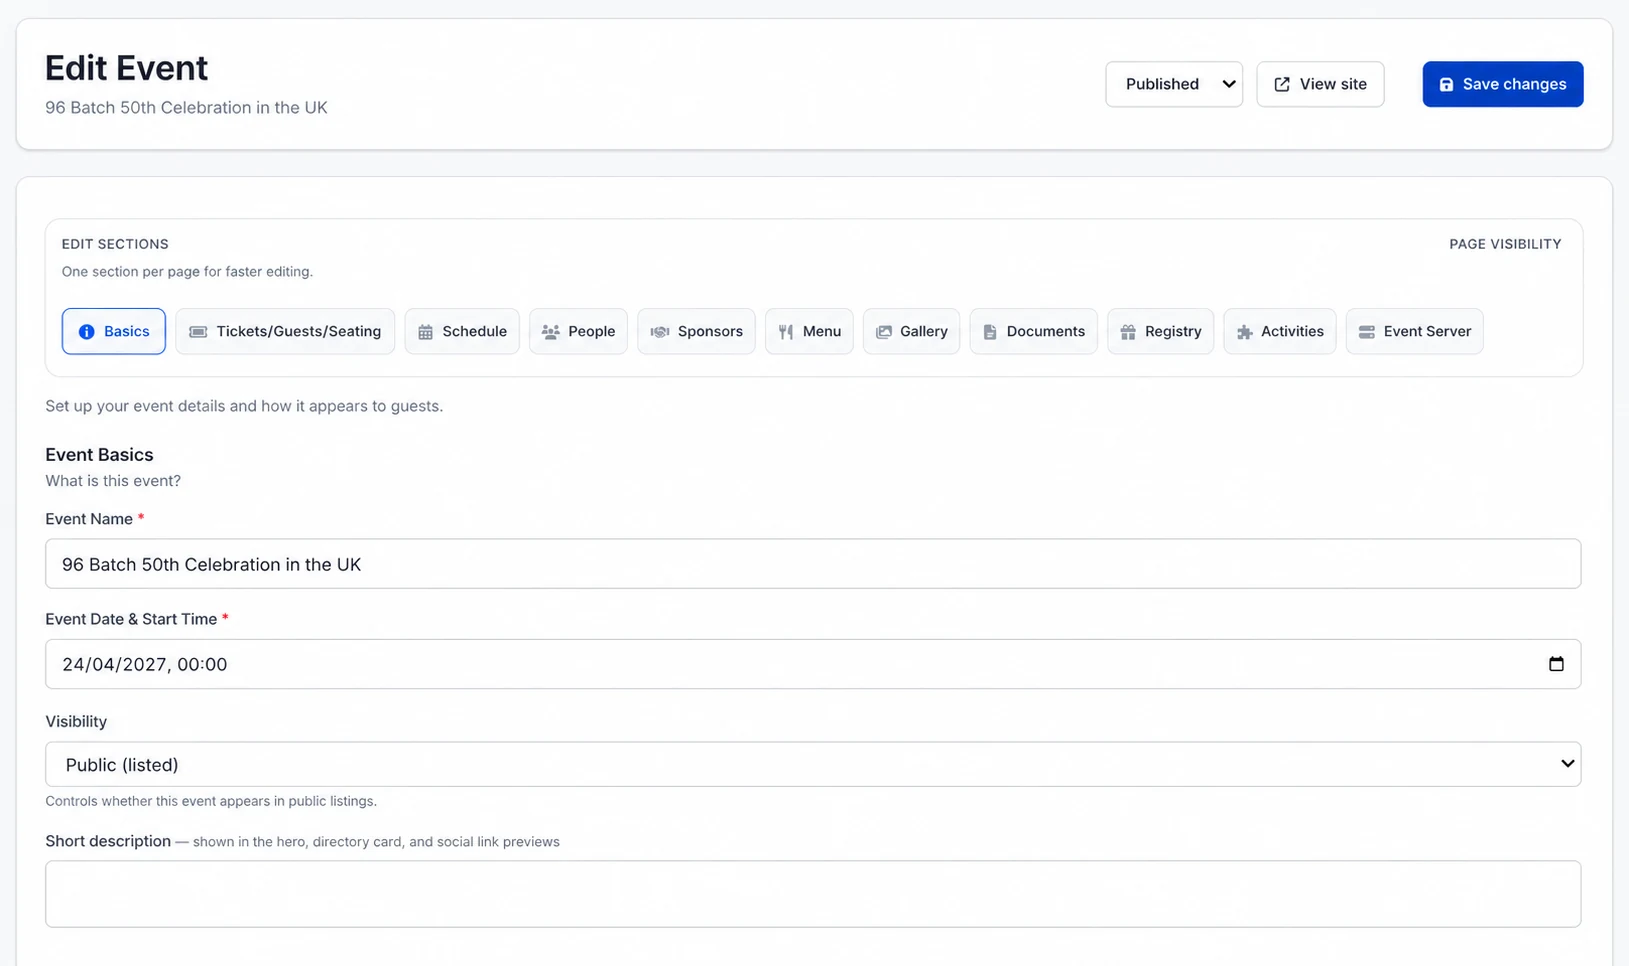
The Basics section controls the event's identity and first public impression. Complete it before building tickets, menus, or seating so every later screen uses the right event information.
Complete the essentials
- Confirm the event name and its generated public URL.
- Add a concise description that explains who the event is for and what guests should expect.
- Set the event date and start time. Check the year and timezone carefully.
- Review the flyer and any hero or branding imagery.
- For public events, select the correct category, tags, and languages.
Add complete venue information
Enter the venue name, address lines, town or city, county, and postcode. Add practical location notes such as parking, entrance instructions, accessibility, or the part of a large venue guests should use. These details reduce support messages on the day.
Control the public site
The event editor includes page visibility controls for tickets, menu, seating, schedule, gallery, documents, fundraising, and other modules. Keep unfinished pages hidden. If the event must be private, configure the event code and site-password behaviour before sharing the link.
Save and preview
Choose Save changes, then use View site. Check the public page on a phone and verify:
- The title and poster are not cropped awkwardly.
- The date, time, and venue agree everywhere.
- Navigation only shows pages that are ready.
- The primary action sends guests to the intended RSVP or ticket flow.
Checkpoint
The event can remain a draft while setup continues. Move on when its public identity, date, venue, and page visibility are correct.